Volvo All Engines (2004 Emissions) Fault Code: SID 146 FMI 5 EGR Control Valve
Fault Condition: If the Engine Management System (EMS) Module detects an open, short to ground or short to voltage while attempting to operate the EGR Control Valve, the Electronic Malfunction Lamp (EML) will turn ON and code SID 146 will set. Code SID 146 will also set if EGR flow is not within the proper range for the current engine operating conditions.
If the Engine Management System (EMS) Module detects a short circuit to ground in the EGR Control Valve high side drive circuit, the EMS Module will turn OFF the high side driver and the driver will remain OFF until the key is cycled.
Possible repairs:
Turn the ignition key OFF first.
1) Disconnect the harness electrical connector from the EGR control valve. Check for continuity between the pins on the EGR Control Valve If there is NO continuity at the EGR Control Valve, the solenoid is open and must be replaced.
2) Disconnect the harness electrical connector from the EGR Control Valve. Check for continuity from either pin on the EGR Control Valve to a good ground. If continuity exists, the EGR Control Valve is shorted to ground and must be replaced.
3) Disconnect connectors A and B from the EMS Module. Disconnect the harness connector from the EGR Control Valve. Check for continuity between the two pins of the EGR Control Valve harness connector and a good ground. If continuity exists, the circuit is shorted to ground. Locate and repair the short circuit.
4) Turn the ignition key OFF. Connect an oil pressure gauge to the EGR Control Valve oil supply line. Plug the open oil port. Start the engine and allow it to idle. If the oil pressure at the supply line is significantly less than system pressure, there is an obstruction in the oil supply line. Locate and repair the cause of the low oil pressure.
5) Disconnect connectors A and B from the EMS Module. Disconnect the harness connector from the EGR Control Valve. Check for continuity between EMS Module harness connector B pin 9 and pin 1 at the EGR Control Valve connector. If there is NO continuity, repair the open in circuit.
6) Start the engine and allow it to idle. With the chassis air pressure at approximately 110 psi, observe the turbocharger vane position. If the turbocharger vanes are NOT near the closed position, refer to VGT turbocharger
diagnostics.
7) Disconnect connector B from the EMS Module. Disconnect the harness connector from the EGR Control Valve. Check for continuity between each pin of the EGR Control Valve harness connector versus a good ground.
If continuity exists, the circuit is shorted to ground. Locate and repair the short circuit.
8) Replace the EGR Mass Flow Sensor assembly with a known good unit. Road test the vehicle and retest the system. If code SID 146 becomes active, reinstall the original EGR Mass Flow Sensor assembly and replace the EMS Module. If code SID 146 does NOT become active, replacing the EGR Mass Flow Sensor assembly corrected the problem. Check all connectors to ensure proper connections.
9) Visually inspect the EGR system for leaks. Leaks are often indicated by soot or carbon marks at joints or connections. If any leaks are apparent, repair or replace the faulty component and retest the system.
10) Start the engine and allow it to idle. With the EMS Module requesting EGR flow, disconnect and connect the EGR Control Valve harness connector several times Road test the vehicle, operating in the full range of loads and engine speeds. If code SID 146 does NOT become active, disconnecting and reconnecting the EGR Control Valve dislodged debris from the valve.
11) Turn the ignition key OFF. Disconnect connectors A and B from the EMS Module. Disconnect the EGR Control Valve electrical connector. Check for continuity between EMS Module harness connector B pin 13 and pin 2 at the EGR Control Valve connector. If there is NO continuity, repair the open in the circuit.
12) Disconnect connector B from the EMS Module. Turn the ignition key ON. Measure the voltage between EMS Module connector B pin 9 and a good ground.
If voltage is present, the high side drive circuit is shorted to voltage. Locate and repair the short circuit.
13) Allow the engine to cool to room temperature. Disconnect the exhaust pipe from the turbocharger and securely cap the turbocharger outlet. Disconnect the intake pipe from the turbocharger and securely cap the turbocharger inlet. Use a regulated compressed air source to pressurize the system to approximately 15 psi. Listen and feel for air leaks along the entire length of the EGR and intake system. Leaks are often indicated by soot or carbon marks at joints or connections. If any leaks are apparent, repair or replace the faulty component and retest the system.
14) Disconnect connector B from the EMS Module. Visually inspect EMS Module connector B for dirt, loose pins, or deformed contacts. If a terminal feels loose or damaged, repair the connector.
15) Disconnect connector B from the EMS Module. Turn the ignition key ON. Measure the voltage between EMS Module connector B pin 9 and a good ground. If voltage is present, the high side drive circuit is shorted to voltage. Locate and repair the short circuit.
16) Disconnect EMS Module connector B. Turn the ignition key ON. Measure the voltage between the EMS Module connector B pin 2 and a good ground.
If voltage is present, the low side drive circuit is shorted to voltage. Locate and repair the short circuit.
17) Allow the engine to cool to room temperature. Disconnect the exhaust pipe from the turbocharger and securely cap the turbocharger outlet. Disconnect the intake pipe from the turbocharger and securely cap the turbocharger inlet. Use a regulated compressed air source to pressurize the system to approximately 15 psi. Listen and feel for air leaks along the entire length of the EGR and intake system. Leaks are often indicated by soot or carbon marks at joints or connections. If any leaks are apparent, repair or replace the faulty component and retest the system.
18) Disconnect EMS Module connector B. Turn the ignition key ON. Measure the voltage between the EMS Module connector B pin 13 and a good ground. If voltage is present, the low side drive circuit is shorted to voltage. Locate and repair the short circuit.
19) Remove the EGR Control Valve from the engine. Visually inspect the exhaust ports inside the EGR Control Valve for carbon deposits that could reduce EGR flow.
If excessive carbon deposits are present, replace the EGR valve.
20) Replace the EGR Control Valve and retest the system. If code SID 146 is no longer active, replacing the EGR Control Valve solved the problem.
21) Restore all connections to the turbocharger. Start the engine and allow it to idle. With the EMS Module requesting EGR flow, disconnect and connect the EGR Control Valve harness connector several times. Road test the vehicle, operating in the full range of loads and engine speeds. If code SID 146 does NOT become active,
disconnecting and reconnecting the EGR Control Valve dislodged debris from the valve.
22) Disconnect connector A and B from the EMS Module. Disconnect the harness electrical connector from the EGR Control Valve. Check for continuity between EMS Module harness connector B pin 9 and all other pins on EMS Module connectors A and B. If continuity exists, the EGR Control Valve circuit is shorted to one of the other EMS Module circuits. Locate and repair the short circuit.
23) Replace the EGR Mass Flow Sensor assembly with a known good unit. Restore all turbocharger connections. Road test the vehicle and retest the system. If code SID 146 becomes active, reinstall the original EGR Mass Flow Sensor assembly and replace the EMS Module.
24) Disconnect connectors A and B from the EMS Module. Disconnect the harness electrical connector from the EGR Control Valve. Check for continuity between the EMS Module harness connector B pin 13 all other pins on EMS Module connectors A and B. If continuity exists, the EGR Control Valve circuit is shorted to one of the other EMS Module circuits. Locate and repair the short circuit.
25) Disconnect connectors A and B from the EMS Module. Visually inspect EMS Module connectors A and B for dirt, loose pins or deformed contacts. If a terminal feels loose or appears damaged, repair the connector. If all the terminals appear to make good contact, replace the EMS Module and retest the system.
Related
-
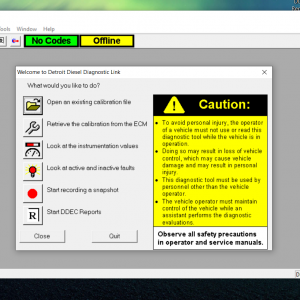
DETROIT DDDL 8.14 SP3 – Detroit Diesel Diagnostic Link 8.14 SP3 2021 ( 1PC )
Detroit $73.00Rated 0 out of 5 -
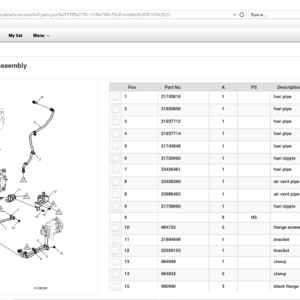
Volvo Impact 2021 Trucks & Buses 06.2021 DVD 9116 Spare Parts Catalog
Trucks software $55.00Rated 0 out of 5
Related products
-
Allison 1000 & 2000 Gen 4 Fault Codes: P0122 Pedal Position Sensor Circuit Low Voltage
1000 & 2000 Gen 4 $50.00Rated 0 out of 5 -
Allison 1000 & 2000 Gen 4 Fault Codes: P0123 Pedal Position Sensor Circuit High Voltage
1000 & 2000 Gen 4 $50.00Rated 0 out of 5 -
Allison 1000 & 2000 Gen 4 Fault Codes: P0871 Transmission Pressure Switch Solenoid E Circuit Stuck Open
1000 & 2000 Gen 4 $50.00Rated 0 out of 5 -
Allison 1000 & 2000 Gen 4 Fault Codes: U1300 J1850 (Class 2) Serial Data Communication Link Low
1000 & 2000 Gen 4 $50.00Rated 0 out of 5 -
Allison 1000 & 2000 Gen 4 Fault Codes: P0847 Transmission Pressure Switch Solenoid D Circuit Stuck Closed
1000 & 2000 Gen 4 $50.00Rated 0 out of 5 -
Allison 1000 & 2000 Gen 4 Fault Codes: P0880 TCM Supply Voltage
1000 & 2000 Gen 4 $50.00Rated 0 out of 5 -
Allison 1000 & 2000 Gen 4 Fault Codes: U1064 J1850 (Class 2) TBC Controller State of Health Failure
1000 & 2000 Gen 4 $50.00Rated 0 out of 5 -
Allison 1000 & 2000 Gen 4 Fault Codes: P1892 Throttle Position Sensor Pulse Width Modulation (PWM) Signal High Input
1000 & 2000 Gen 4 $50.00Rated 0 out of 5 -
Allison 1000 & 2000 Gen 4 Fault Codes: U2104 CAN Bus Reset Counter Overrun
1000 & 2000 Gen 4 $50.00Rated 0 out of 5 -
Allison 1000 & 2000 Gen 4 Fault Codes: P2810 Solenoid G Electrical
1000 & 2000 Gen 4 $50.00Rated 0 out of 5 -
Allison 1000 & 2000 Gen 4 Fault Codes: U1041 J1850 (Class 2) ABS Controller State of Health Failure
1000 & 2000 Gen 4 $50.00Rated 0 out of 5 -
Allison 1000 & 2000 Gen 4 Fault Codes: P2773 Torque Control Request Ignored – ECM/TCM
1000 & 2000 Gen 4 $50.00Rated 0 out of 5 -
Allison 1000 & 2000 Gen 4 Fault Codes: P0846 Transmission Pressure Switch Solenoid D Circuit Stuck Open
1000 & 2000 Gen 4 $50.00Rated 0 out of 5 -
Allison 1000 & 2000 Gen 4 Fault Codes: P0876 Transmission Reverse Pressure Switch Circuit Stuck Open
1000 & 2000 Gen 4 $50.00Rated 0 out of 5
-
SERVICE MANUAL INTERNATIONAL ENGINE VT365 (2003 & Older)
INTERNATIONAL ENGINES $24.00Rated 0 out of 5 -
SERVICE MANUAL Eaton Fuller® HD FR/FRO TransmissionsTRSM2400April 2013
TRUCK MANUALSRated 0 out of 5 -
SERVICE MANUAL International Engines MaxxForce 11 & 13 (2014 & Newer)
INTERNATIONAL ENGINES $20.00Rated 0 out of 5


